Andreasmax
Senior Squad
it works perfect, thanks...

This is a reminder of 3 IMPORTANT RULES:
1- External self-promotion websites or apps are NOT allowed here, like Discord/Twitter/Patreon/etc.
2- Do NOT post in other languages. English-only.
3- Crack/Warez/Piracy talk is NOT allowed.
Breaking any of the above rules will result in your messages being deleted and you will be banned upon repetition.
Please, stop by this thread SoccerGaming Forum Rules And Guidelines and make sure you read and understand our policies.
Thank you!
Amazing minikits master[EDIT APR 20th:
VERSION 2.0 released! Improved kit textures and introducing long sleeves! Link for info and tutorial here!]
You are a kitmaker and have trouble to make minikits? Or you are not a kitmaker but have downloaded a beautiful kit without minikit and don't know how to make them?
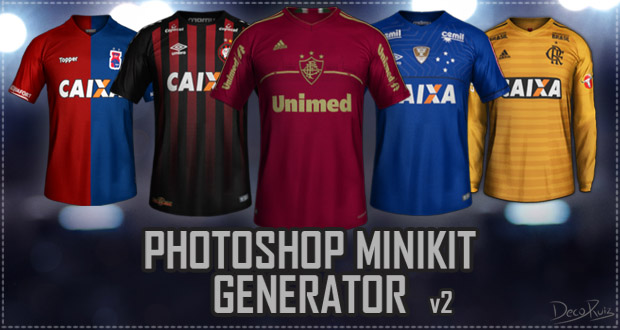
Yeah, your problems are kinda solved. I present you a pack to generate minikits with a little of EA Style just by using Photoshop CC + the kits textures in just a few steps. Here's a few examples:


How does it work? It's simple. Follow the small tutorial below (my Photoshop is in portuguese, but I guess there's no trouble to understand the steps in the images).
NOTE: It is a work in progress, they are not perfect and your feedback is very important and very needed to make the models better. It is kinda time consuming to do them, so I have no ETA on the long sleeves models yet but they will be done.
NOTE 2: The models are from FIFA 18, so if you import FIFA 16 or older textures, the sleeves will be messed up.
1- Download and extract one of the Models .rar. Here's a link to a google drive folder with all of them.
2- Open the PSB file.
3- Right click the intelligent object "Model" and click "Edit Content". Alternatively, you can double click the intelligent model thumbnail.

4- Photoshop will now open a new window with the kit 3D model. Make sure you are with "Move tool" selected.

5- Right click the 3D model and choose the 'Material' option (it's the one in the middle) and now you'll have to load your kit textures. In Diffuse, load your Color kit texture.

5.1- You can also load the normal texture. It's optioal, but the result will be better with it. Also, the yellowish FIFA normal won't work correctly with Photoshop. You can convert them easily by opening a normal texture in Photoshop, creating layer painted with the color #8080ff and inserting the original yellow normal texture on top and with "overlay" in blending options.

5.2- You can mess around with Photoshop options for lightning or texture options before the next step to get different results.
6- After loading the textures, it's important to render the 3d model. It may take a few seconds or minutes depending on yor system. Guess it won't take more than 2 minutes.

7- After rendered, just go to File>Save and close 3D model window. Your minikit is ready! Just resize it to 256x256 and you're ready to import in to FIFA 18 or any other FIFA game.

It was tested by a few kitmakers and they liked it. Hope you all like it too. And again, please, give me feedback to improve it!
Wow they look amazingJust a small bump here.
New version incoming!

New models, easier rendering process, render in any size you want, long sleeves models for each collar (no more actions), female models, full body preview and... FIFA 16 textures support
Yeah!Wow they look amazing
you will add support for the news collars for example collar number 2?

Great news! There will be also the old collar 9?Just a small bump here.
New version incoming!
New models, easier rendering process, render in any size you want, long sleeves models for each collar (no more actions), female models, full body preview and... FIFA 16 textures support
Wooow amazingYeah!
Both new and old collar 2 will be there.
New version of link is availabe?Just rendered this minikit (or should it be "bigkit") in 1024x1024 so you can see one of the new features.

You can adjust the lights to achieve other results. The default value is going to be 100%, this big kit preview was rendered in 90%. I'm going to explain better when I release the new version in a video tutorial.@decoruiz
Can you make it brighter? Much brighter.
Please compare with original EA's minikits from 18/19/20
It will be great if we could generate minikits close to EA style.You can adjust the lights to achieve other results. The default value is going to be 100%, this big kit preview was rendered in 90%. I'm going to explain better when I release the new version in a video tutorial.
 Users\"YOUR USER"\AppData\Roaming\Adobe\Adobe Photoshop CC 2017 (or your current version)\Presets\Actions
in the window where the kit is imported in png format, in the other boxes remove other texturesThanks for this great tool!
I have a problem with Collar 7. On the rendered Minikit there is still the shape of the club logo from the template kit visable. Also you can see the shape of adidas stripes on the left side.
How to solve this? I even rendered two times, but it had no effect.
View attachment 40971
where can i download new minikit generatorJust rendered this minikit (or should it be "bigkit") in 1024x1024 so you can see one of the new features.
I think there is just old version. If you just need old version then I may have somewhere in my PC.where can i download new minikit generator
where can i download new minikit generator
 downloads.fifa-infinity.com
The only way is to convert the sleeves texture to the FIFA 18 format. I've made an action to convert them for my personal use (you can download it here), but I may work on a FIFA 16 model in the future due to its popularity.
Does anyone still has these action files?Thanks. I will see how it works.


